Understanding the huge effect that the direction of light has on your portraits will increase your confidence, method and ultimately your imagination..
Many years back, I discovered the significance of the direction of light and its relationship to photography. Comprehending that there are essentially three instructions, each needing a various method to exposure, right away had an essential and long-lasting influence on my work and my confidence.
Each direction of light has a really different effect on the kind of the topic– mostly due to whether shadows are present and where they fall. I attempt to deliver all three directions of light on every shoot whether I am working inside your home or outdoors.
Using continuous lights such as the Rotolight AEOS and NEO, you can see exactly where the light is falling before taking a shot. Sony A9 II, 85mm, 1/800sec at f/1.4, ISO 500 Photo credit: Kate Hopewell-Smith.
It is essential to recognise that when you work on location it can be much more difficult to control the light than in a blackout studio set-up, which is the equivalent of starting with a blank sheet of paper. I do not get focused on ‘ideal’ picture lighting but still borrow from styles such as Rembrandt or Butterfly.
In all cases my approach is to judge the ambient lighting first, how can I use it to my advantage and how does it help to develop mood and atmosphere. I decide on whether I need to customize the light or add extra lighting to further enhance the portrait. Selecting how you wish to deal with light in regards to direction need to assist you make crucial presenting and directing decisions too.
Rotolight AEOS, Stripbox Sony A7 IV, 24-70mm, 1/100sec at f/4, ISO 1250 Photo credit: Kate Hopewell-Smith.
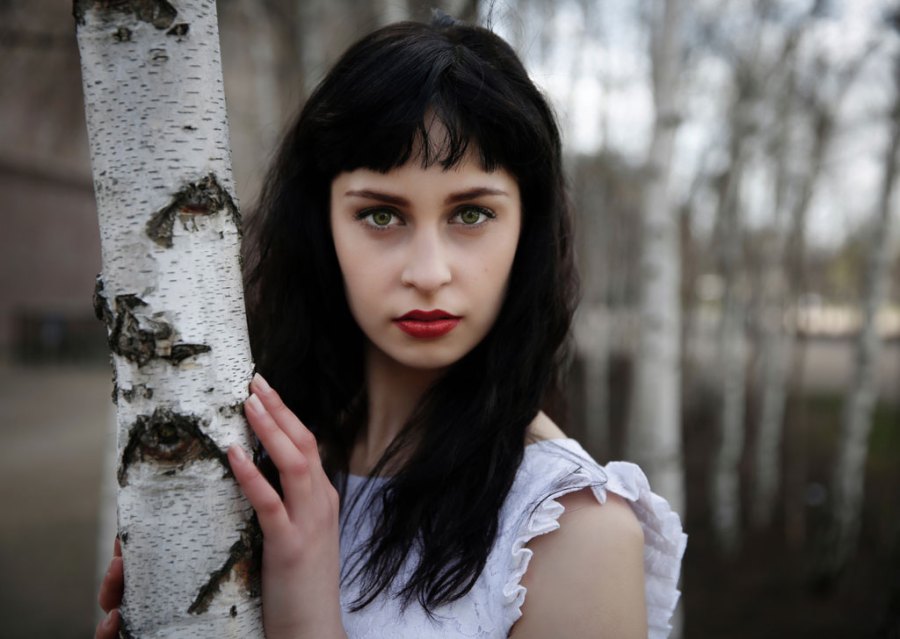
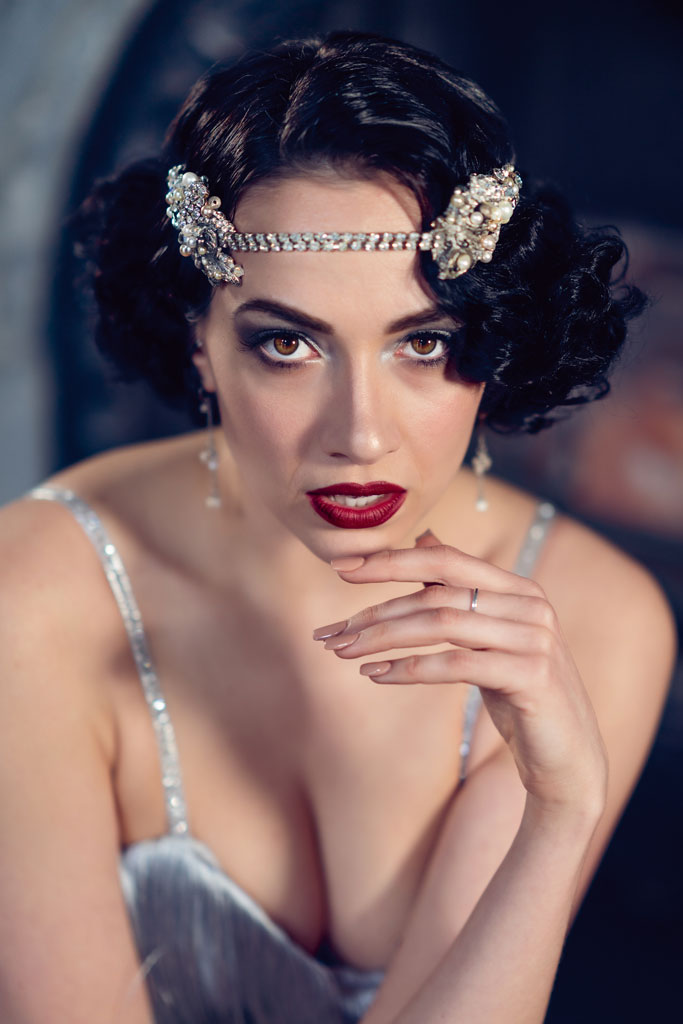
Direction of Light: Frontal Lighting.
Normally, this is the most convenient to work with and you are aiming for a low contrast, frontal source of light. This is very easy to attain inside your home with window light (stand with your back to the window however ensure you do not cast any shadows on your topic). Outdoors you would either need the diffusion provided by cloud cover or the best option is to look for some top shade whereby there is something above the subject that cuts out direct down light and assists to enable the light to fall at more of an angle on the face. In terms of artificial lighting, you need to produce the most significant and softest source possible with modifiers like soft boxes or umbrellas.
Since shooting more and more video and taking a hybrid approach I definitely enjoy the brand-new Rotolight SmartSoft Box which allows you to electronically adjust diffusion, focus and spread of the LED light source. Soft, frontal, lighting will make skin appearance lovely and enhance eye colour, but it can look extremely flat and do not have drama due to the fact that any shadows fall behind the topic. If you can move the light, a great beginning point is overhead and offset to 45 degrees.
This was shot in natural light with some leading shade to assist angle the light towards the face. Sony A9 II, 50mm, 1/250sec at f/1.4, ISO 320 Photo credit: Kate Hopewell-Smith.
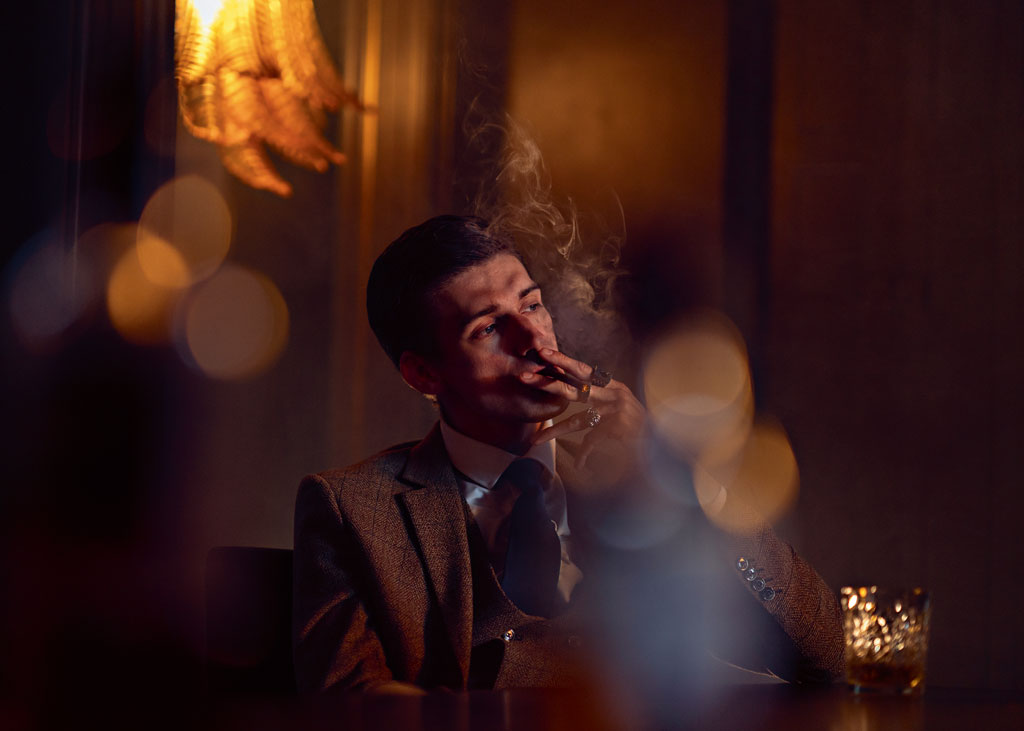
Instructions of Light: Backlighting.
Having light hitting the subject from the back can quickly improve your pictures — producing some separation from the background, enhancing kind, and adding environment and state of mind. It can be difficult to get it right as many elements are at play, such as the strength of the light– is it the key light or simply a lovely accent and is the light at a great height and not introducing unwanted flare? Critically as a single light it will likely throw the topic’s face into shadow and demand some kind of fill lighting to guarantee it is still a picture and not a silhouette. Backlight will likewise deceive your metering system into underexposing the image so be prepared to raise your direct exposure or usage direct exposure compensation.
Natural light with a reflector to bounce some light back into the face Sony A9 II, 50mm, 1/1000sec at f/1.4, ISO 16. Photo credit: Kate Hopewell-Smith.
When you are shooting with strong and low backlight I advise constantly changing the height of the cam and moving from left to right as you shoot. Some images will not work due to extreme flare but you need to get some lovely shots. It is worth utilizing a lens hood but if the sun is extremely low this will not stop the flare– I often use one hand to flag the lens.
It’s also worth thinking of the colour of the light as backlight is best early or late and typically has a warmer or golden tone. You have many options for lighting your subject’s face such as using simple reflectors or introducing a secondary light source. The back light will include mood and form but ensure you are considering the skin tone and lifting shadows by presenting some additional light from the front.
Natural light with 2x Rotolight AEOS in strobe mode. Sony A9 II, 135mm, 1/200sec at f/3.5, ISO 320. Photo credit: Kate Hopewell-Smith.
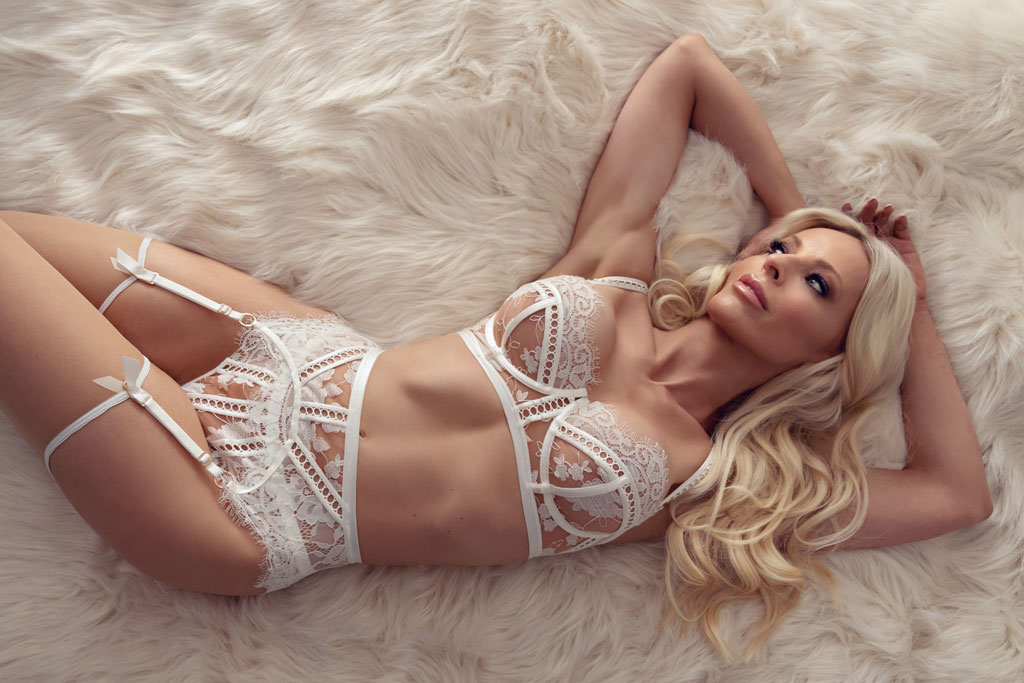
Instructions of light: Side Lighting.
Due to the light striking the topic from the side some areas will be lit and some will be in shadow– ideal for exploring the subject’s shape and type. Nevertheless, human faces can be difficult to light well in high contrast: our noses job and cast strong shadows and our eyes, which are recessed, can quickly be thrown into shadow by overhead lighting. To prevent severe facial shadows or split-lighting, I always turn my subject’s nose to the light.
Well-executed high- contrast images are typically remarkable and effective whilst softer shadows can still produce lovely results that are not as severe. Side lighting is frequently utilized for character portraits but can likewise produce beautiful boudoir images that celebrate the female form. The subtle addition of some regulated backlight can be helpful by creating some separation and preventing the shadow locations from entirely merging with the background.
Maximizing the golden natural light. Sony A9 II, 50mm, 1/500sec at f/1.4, ISO 125. Image credit: Kate Hopewell-Smith.
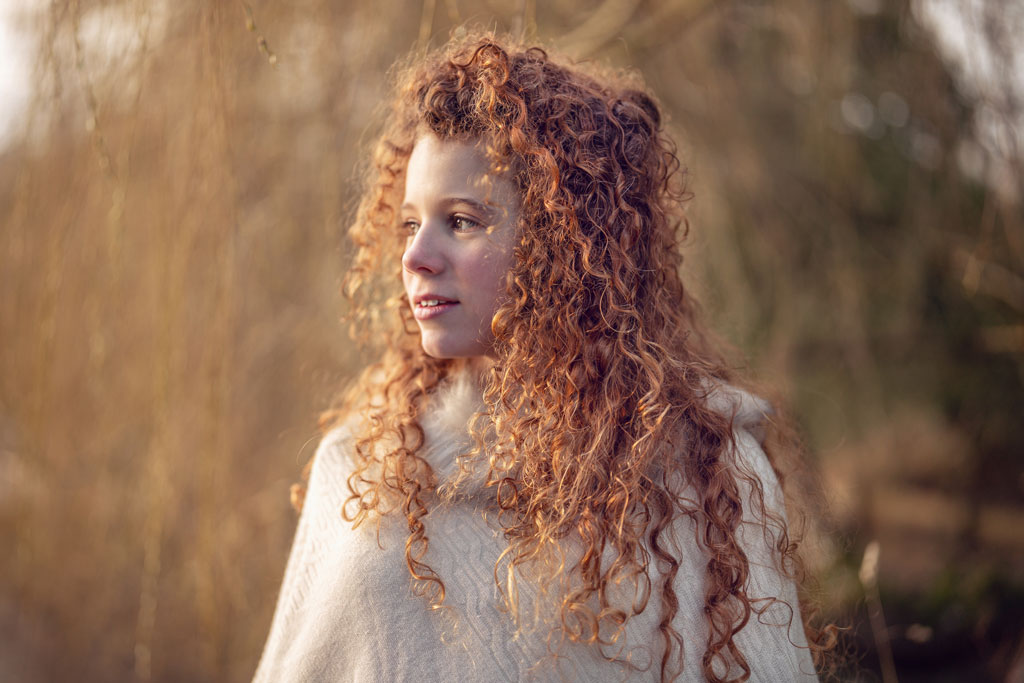
Side lighting requires mindful control of the light and posturing, so dealing with natural or constant lighting makes this process much easier, as you can direct according to what you see. Shooting pictures on area using this approach to direction of easy work equally well with natural, flash, or constant lighting and I pick my method based on the ambient light, environment, and scenarios of the shoot.
Having the capability to modify light in regards to contrast, speed and colour is really essential and in mixed lighting conditions I typically set my white balance to a specific Kelvin instead of counting on any presets. Lastly, I do not simply work like this for portraits but for all topics, consisting of food photography.