There are three filters that every landscape photographer need to have in their electronic camera bag: a Neutral Density graduated (ND Grad), Neutral Density (ND), and polariser filter. From capturing a longer exposure time to minimizing the glare from a reflective surface, Verity Milligan describes why these are the top 3 filters you require for exceptional landscape shot.
1. The ND Grad
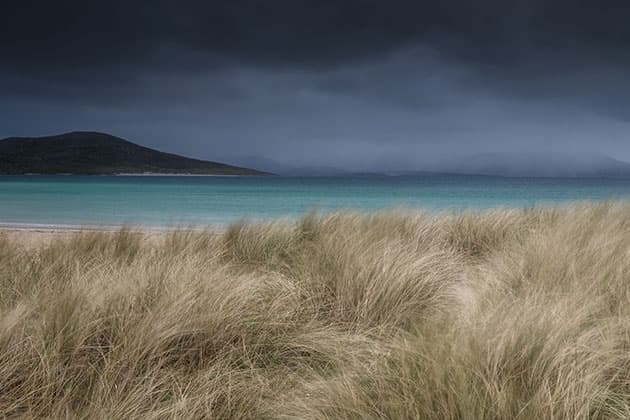
An ND graduated filter improves this heavy sky and includes atmosphere. Credit: Verity Milligan
A Neutral Density Graduated (ND Grad) filter is like an ND filter but with a progressive blend from dark on the leading to clear at the bottom. The top part masks over the sky meaning the direct exposure time in between the sky and land read closer exposure values.
Verity states, ‘I utilize finished filters when I want to expose for the foreground and keep the appropriate direct exposure in the sky. They can be useful when contending the start or end of the day when the light is low and it can be difficult to maintain good direct exposure in the foreground and the sky. They can likewise be really useful if I’m shooting in gloomy/stormy conditions.’ She continues, ‘The advantages to using a graduate is the liberty it can provide you to shoot in bright conditions and the control over the direct exposure. Sure, you can reproduce it to a particular degree in post, however really this isn’t ideal.’
In regards to disadvantages, Verity advises that you should take care regarding what situations you release them in. ‘For example’, she continues, ‘if you’re shooting a mountain range with an uneven horizon, you can inadvertently end up darkening the mountain peaks and unbalancing the general direct exposure.’
Finished filters come in different strengths and in a soft or hard blend. As you can envision the soft is more progressive whereas the tough is less so. Which one to pick to utilize is your decision, as some choose soft whereas others prefer hard. Verity for the many part opts for soft grads rather than difficult since they are a bit more forgiving if you’re shooting landscape images. ‘However,’ she says, ‘tough graduates can be extremely helpful and reliable if you had actually a defined horizon, for example if you’re shooting a seascape.’
When asked if she ever stacks them she responds, ‘I tend not to due to the fact that it can suggest that the sky is almost too dark and ends up looking surreal.’
2. The ND filter
The unique exterior of the Selfridges structure in Birmingham’s Bullring shopping center shot with a Neutral Density filter to create this particularly moody and atmospheric image. Credit: Verity Milligan
A Neutral Density (ND filter) is available in numerous strengths (these are measured in stops). For those who desire a versatile alternative, variable ND filters can modify their strength by spinning– however usually the quality is not so excellent.
In terms of the advantages they certainly assist to give an image type. It can be hard to tell a narrative through a single image, so a sense of movement can be extremely useful. ND filters can be challenging.
3. The polariser
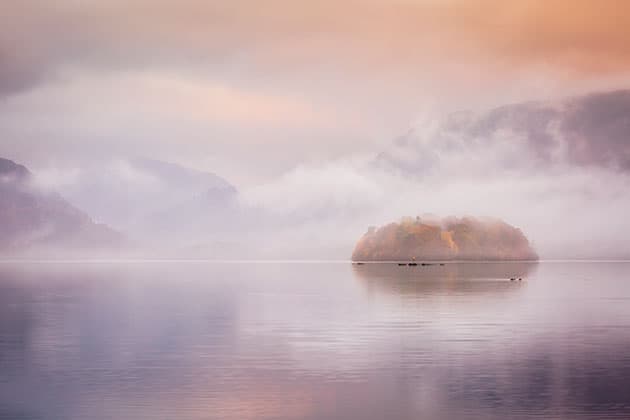
Verity accomplished this pinkish-purple, ethereal picture of Lake District’s Derwentwater by utilizing a polariser. Credit: Verity Milligan
the polariser is Verity’s favourite and the one she chooses for many of the time. ‘For me, a polariser is a vital piece of set for a landscape photographer. The LEE polariser I utilize has the benefit of warming up the image, however it likewise makes the colours pop. It can also be very beneficial for taking out reflections from bodies of water and reducing reflections if I’m photographing a structure.’
‘Using a polarising filter guarantees you have more control of the landscape in front of you, and opens up the possibility of exploring the scene in a different method. If your polariser is in the incorrect position you might end up with the sky looking rather odd, and if you’re utilizing one that is connected to a filter holder it produces a small area in between the lens and filter which can increase the threat of lens flare if you’re shooting into the light.’
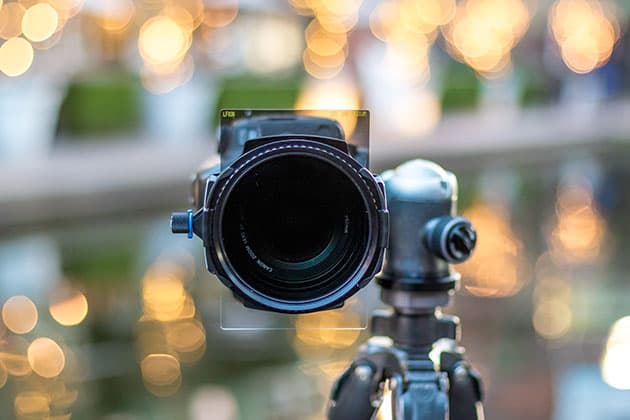
Filter systems
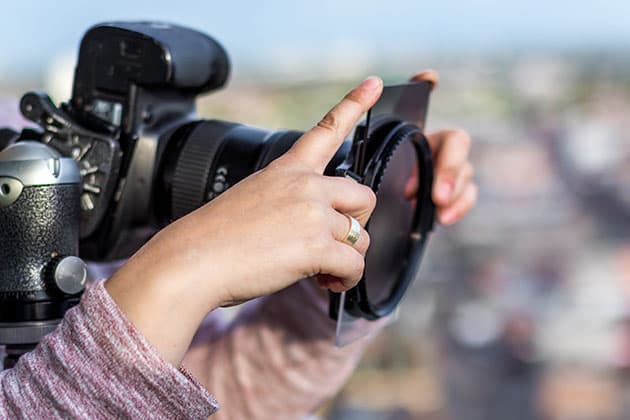
Most expert photographers utilize the filter holder systems. Credit: Verity Milligan
When it comes to investing in a filter there are 2 main systems worth choosing from. You can either opt for a circular filter, which typically screws onto the end of your lens, or a square filter, which slots down a filter holder connected to the front. The majority of experts utilize the holder system, as it can be more flexible and simpler to stack filters on top of each other, however they tend to be more expensive.
You can likewise acquire step-up and step-down rings if you have numerous lenses with different thread sizes and want to connect the very same filter. We recommend you buy the filter that fits the biggest thread size of your lenses, and use step-down rings to fit accordingly.
Stacking filters
Credit: Verity Milligan
If you find that you require a longer direct exposure time than your ND filter can, you can stack them together. Verity advises, ‘If I wish to have an exceptionally long exposure and there is a lot of light then I will stack ND filters (typically a 6-stop and a 10-stop), however this can result in long exposure times and I’m not the most patient of professional photographers!’ However it’s not simply ND filters you can stack together– you can likewise blend them up, as Verity describes: ‘I’m far more most likely to stack an ND graduate with other filters such as a graduated and a polariser, that both have a specific purpose when I’m capturing an image.’
Verity’s top filter suggestions
Clean regularly — It can be endlessly irritating when you get home from a shoot and understand that you’ve got lens flare and spots all over that killer image since you have not troubled to make sure the filters were tidy. When installing them onto your video camera take care not to leave any finger prints.
Less is more — When it comes to graduated filters, I discover that less is more. I tend to use a. 3 or a. 6 rather than a. 9 or 1.2.
Buying — When purchasing an ND or ND graduate filter I would suggest getting the 100mm square variations that sit in a filter holder. This supplies much more adaptability and you can utilize it in conjunction with other filters such as a polariser. The screw-in ND filters are much less expensive, you need to buy one (or a step-ring) for each lens filter size and this might become more pricey.
Usage carefully — When you initially get your hands on ND filters, it can be interesting and you may want to use them right away. However, there are specific scenarios where they are more efficient, such as when you’re by the coast or on a particularly windy day. Also, you don’t have to take a truly long direct exposure; often even a one-second long direct exposure can develop something fascinating.
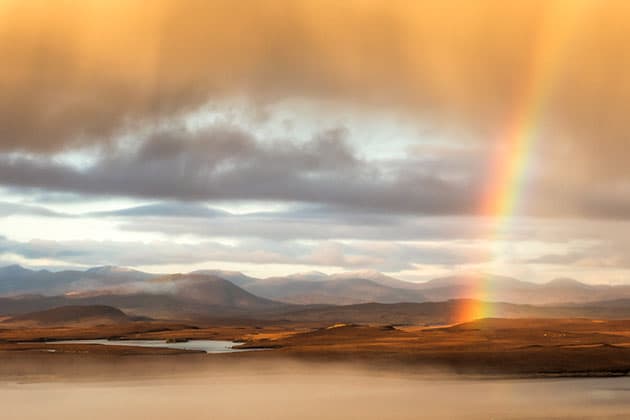
Improve reflections — Polarising filters can help to get the most out of an image. I’m a fan of utilizing one to improve the reflections in a scene, particularly if I’m shooting beside a lake on a still, misty early morning. They can likewise be very beneficial when catching images of the coast as you can use them to eliminate reflections for damp rocks and create a rather intriguing foreground. Stacked with other filters they can help create something amazing unusual. They’re also dazzling for pulling out all the colours of a rainbow, if you’re fortunate sufficient to find one!