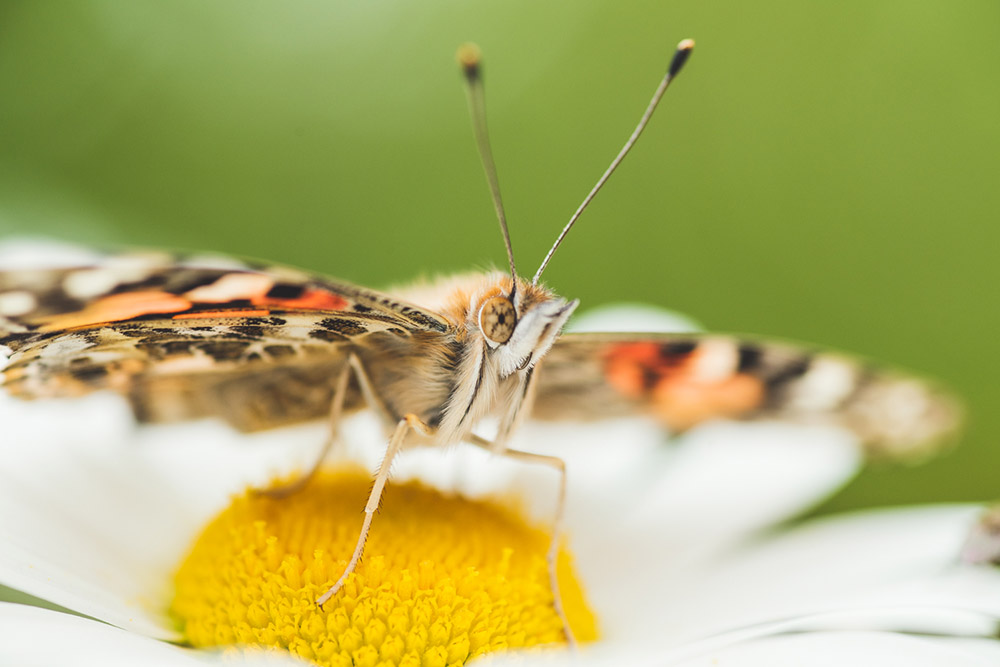
Our complete guide on wildlife photography shows you how to begin with this category– from research, kit and settings on your camera. For those who enjoy being surrounded by nature, wildlife photography can be a really therapeutic and rewarding category to shoot, although perseverance is required. Animals (specifically wild ones) are often fast in their movements making it tricky to focus.
Follow this guide and capture impressive wildlife pictures.
Wildlife photography starts with research
The best way to become a much better wildlife photographer is to research, research, research study. The more info you know about your topic the much better the images you can shoot. Learn about their habitat, diet plan, and behaviour. Is the animal harmful, shy, or aggressive, do they live in packs or alone? Not just will this ensure you are completely prepared when out in the field, however it also means you will progress at anticipating their motions, in addition to protecting.
It’s an excellent idea to research other wildlife professional photographers so you can gain from the best. Photographers like Mattias Klum, Will Burrard Lucas, Frans Lanting and Amy Gulick to name just a few will fill you with motivation.
Have a look at the Wildlife Photographer of the Year past and present winners too as there are lots of inspiring images in there. You’ll likewise find a large variety of posts on wildlife and nature photography in the Wildlife Photography area of this site, and if you understand what type( s) of animal you want to photo, then you ought to be able to find a specific guide to photographing them, whether that’s birds, nighttime animals, or Rhinos in Africa.
Do your research study prior to you start so you know the practices and behaviours of the animal you want to picture well. Copyright: Kevin Schlafer / Getty Images
What kit do I need for wildlife photography?
If you are brand-new to photography then you might believe you need lots of fancy and costly long lenses to shoot wildlife, however, this merely isn’t the case. All you need to get going is a video camera and lens.
We’ve spoken to many wildlife photographers who at the start of their career’s just made do with what they had. Wildlife photographer Sam Hobson made his name using a wide-angle lens (not your normal go to lens for wildlife). His wide-angle award winning Bristol city fox images are amazing and well worth checking out.
If you do want to buy a more standard long-zoom wildlife lens the Sigma 150-600mm f/5 -6.3 Contemporary DG OS HSM is a great budget choice. Among these second-hand can be picked up for around $800/ ₤ 700. There’s also a range of other lenses that are well suited to wildlife use, or for an easier option, an ultra-zoom video camera might be a good choice.
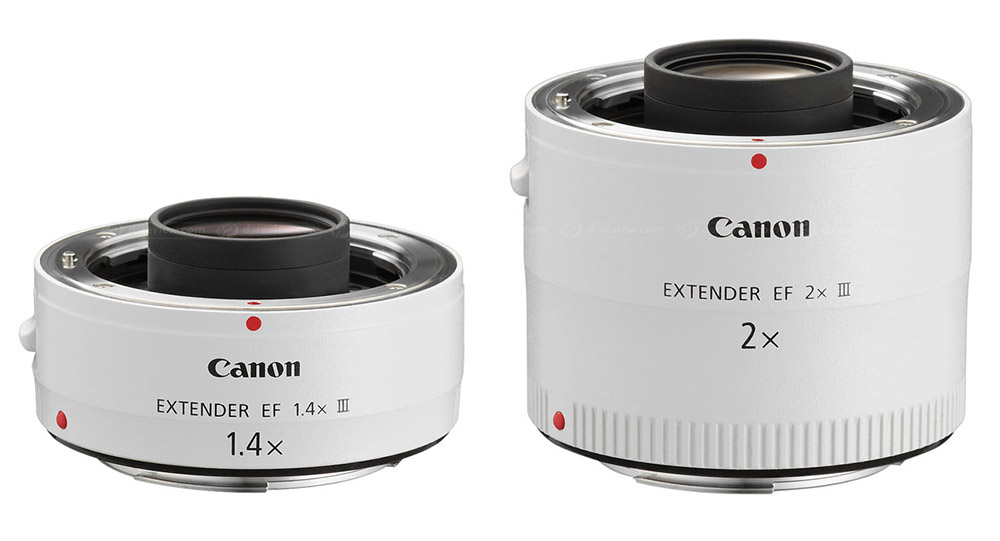
If you have a little budget an extender can help you get that additional little reach, as long as your lens is compatible.
For those with a smaller sized budget, an extender deserves considering. This piece of set fits in between your lens and cam body so ensure you buy one that is compatible with your camera system, as long as it works with your existing lens.
An extender’s job is to increase the focal length of your lens. A 2x extender on a 200mm lens will convert the lens to 400mm. An x1.4 extender on a 200mm lens will increase the lens to 280mm. It’s worth keeping in mind that the extender will reduce your largest aperture setting. If your lens can open up to f/2.8 with an x1.4 extender aperture setting will become f/4. With a x2 extender, you will lose 2 aperture stops so your widest setting will become f/5.6.
Extenders differ in price, and we ‘d recommend searching around on the pre-owned market to save cash.

Which electronic camera is best for wildlife photography for novices?
The very same uses: All you require is a cam and lens. You can check out our picks of the finest electronic cameras for wildlife photography, which have whatever from economical designs for beginners to the outright finest expert electronic cameras on the market.
Watch and observe wildlife
It’s tempting to begin snapping as quickly as you find an animal, you’ll get much better outcomes if you stand back, observe and examine the subject and environment initially. Watch how the animal behaves. Are they alright with your existence? Where is the light originating from? Where is the best background? Is their behaviour foreseeable? Are you in the best position? Often by slowing down and shooting less, we can achieve more. Be prepared to return to the same place and have perseverance to get a great shot. Do not feel disheartened if you do not achieve what you desire right now– Rome wasn’t integrated in a day!
The welfare of the animal needs to be put above your needs to get an excellent shot. This is why you require to research study completely as there is no excuse for ignorance.
Read this guide to being an ethical wildlife photographer.
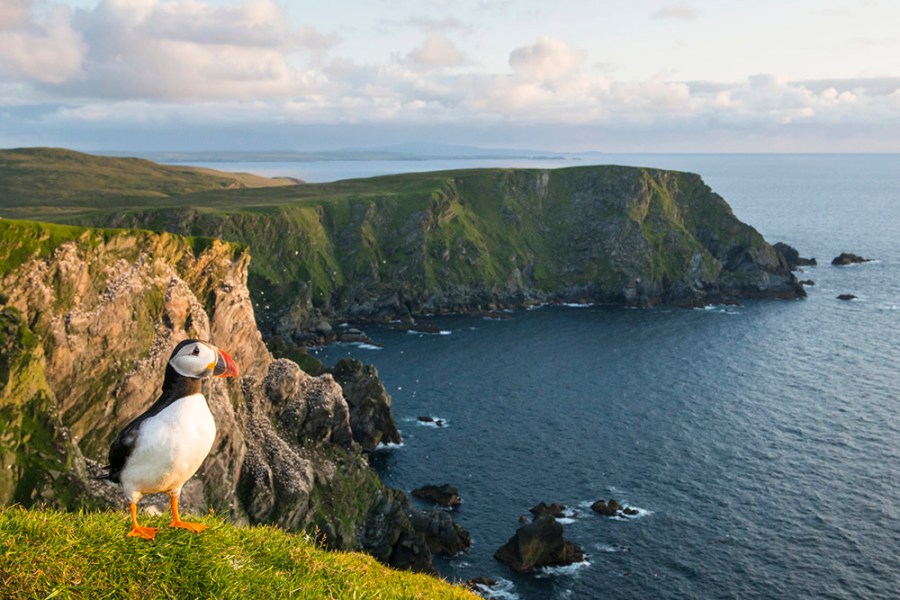
Atlantic puffin (Fratercula arctica) at clifftop edge, Hermaness National Nature Reserve, Unst, Shetland Islands, Scotland. Research study is important so you understand where and when you can photograph nature. Image: James Warwick, Getty Images
Wildlife video camera setup and settings
What settings should I use for wildlife photography?
There is no right or wrong shooting mode for photographing wildlife, and each photographer will have their own approach, however making sure your camera is setup and ready to go is crucial to catching the action as it takes place.
As a great beginning point, I discover it most convenient to shoot in Shutter concern mode. In this mode you can totally control the shutter speed and leave the cam to work out the best aperture and ISO speed setting. Your electronic camera is working out these settings you do need to be conscious of what your aperture and ISO speed settings are checking out.
Put your cam into Shutter top priority (S or Tv).
Examine the light– increase your ISO setting if need be.
Open the aperture broader if you require more light.
Using shutter concern will be of specific benefit for fast-moving subjects, and utilizing a quick shutter speed such as 1/500s is an excellent beginning point (more on this below). If you know your topic is sluggish moving, then you might want to utilize aperture priority so that you can more quickly control the amount in focus in the shot.
If you don’t yet have a grasp on what shutter speed, aperture and ISO are we recommend you spend a long time getting to know these settings on your video camera and to try out seeing the different impacts they can attain. For a refresher, have a look at our guide to direct exposure, aperture, ISO, shutter speeds and more.
Experiment with how you like to shoot with your electronic camera. We suggest you attempting aperture priority as a beginning point.

Make certain it’s sharp.
There are three key things to think about for accomplishing sharp wildlife shots, the shutter speed, aperture setting, and focus:.
Utilize a quick shutter speed:.
Make sure your shutter speed is reading a minimum of 1/500sec if the animal you are photographing is moving or for really quick movements 1/1000sec. If it is fixed then you’ll be great with a setting of 1/200sec or above (depending upon the lens you’re utilizing).
Using a quick adequate shutter speed will ensure your subject stays sharp even when it is moving. Image: Steven Greenfiled/ 500px, Getty Images.
Aperture setting.
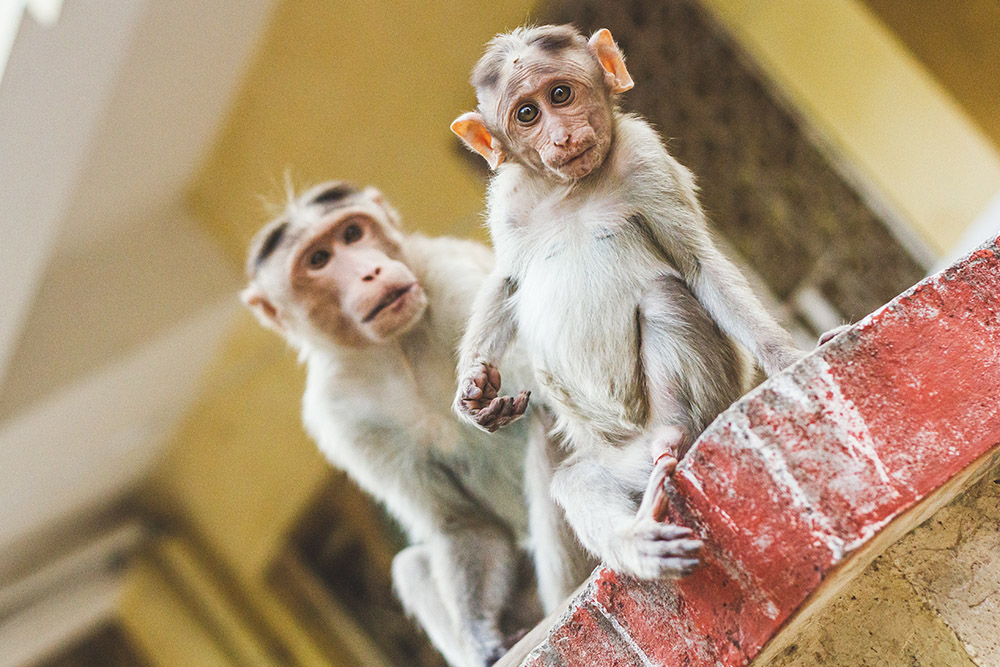
How much of the animal do you want sharp? If you are close and focus on the eye at f/2.8, the eye will be sharp however the face will blur. This can look terrific if it is what you want, but if you desire other functions like the nose to be sharp then you’ll need to close the aperture down. In this example, the Rhesus Macaque monkey in the foreground remains in focus and the one behind is soft, as the image was taken at f/2.8 (on a full-frame electronic camera).
In this image the aperture has actually kept the foreground Rhesus Macaque monkey sharp and blurred the other in the background. Copyright: Claire Gillo.
Focus.
That method if your topic is moving (even little motions) you’ll have more opportunity of keeping it sharp. Trying to forecast where your subject will move into the frame assists with this aspect and once again this is where your research study comes in helpful.
The current mirrorless cameras from Canon, Nikon, Sony, Olympus and Fujifilm provide subject detection AF for a variety of wildlife, depending on the camera design chosen, and subjects include birds (Olympus and Fujifilm), family pets (felines and canines), together with other animals, and the system is designed to spot and focus on the topic’s eyes! This can help you greatly in this genre of photography!
Track your topic and predict where they will go into the frame to attain sharp shots. Jeremy Woodhouse, Getty Images.
You do not constantly have to be sharp.
There are some situations in wildlife photography when a slow shutter speed is more appropriate than a fast one. Recording the motion of flocks of birds flying throughout the sky, or panning with a moving animal to blur the background and give the feeling of movement. You can experiment with this method to produce something different from the standard.
With the best subject decreasing the shutter speed setting can get you some excellent outcomes. Image: John Fan Photography, Getty Images.
Push the ISO.
Any photographer will inform you that they like a low ISO setting as they then do not need to handle sound, nevertheless when it comes to shooting moving topics like wildlife you have to be prepared to press the ISO up and accept the grain. It’s more important to have your subject sharp and a little rough than completely unusable. If your image has excessive noise, then you can constantly process the raw files, and minimize sound further.
Often a great image of an animal can be a little blurred. Do not right away dismiss a technically flawed image if the image has character or tells a great story.

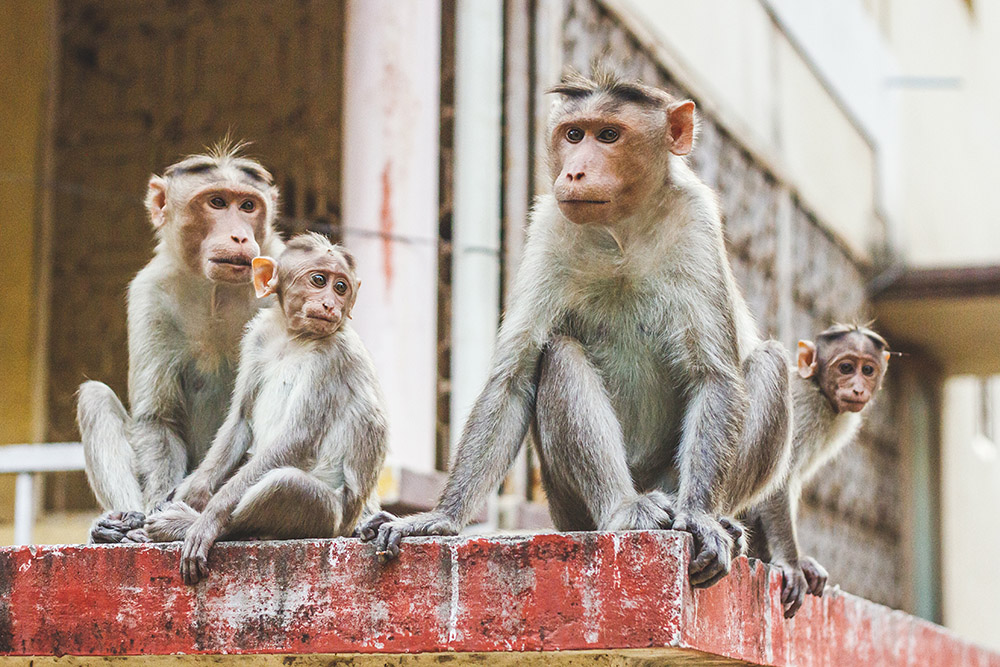
At ISO 800 the image is noisy however the scene of the Rhesus Macaque monkey family is still effective. Copyright: Claire Gillo.
The background is important!
The background setting of your wildlife image is certainly just as crucial as the primary subject whatever your approach, as it can totally change the look of an image. If you wish to shoot a strong animal portrait then look for a plain background to frame your subject against. In some situations (certainly not all) you may even be able to drop in a plain background behind the topic( s).
The background is simply as important as your subject. Plain backgrounds create the perfect setting. Image: Lillian King, Getty Images.

For example, if you set up a bird feeder in the garden you might do so in front of a studio background and select whatever colour you want behind. Although there is much we can’t control in wildlife photography, sometimes we can produce much better conditions for ourselves to improve our luck.
In a wide-angle wildlife image, the setting is crucial too. You want to utilize the scene to inform the story. Experiment with different cam angles– often coming down low provides an alternative take on a scene that we are not utilized to seeing.
Low angles work particularly well for large angle wildlife images. Image: Anup Shah, Getty Images.
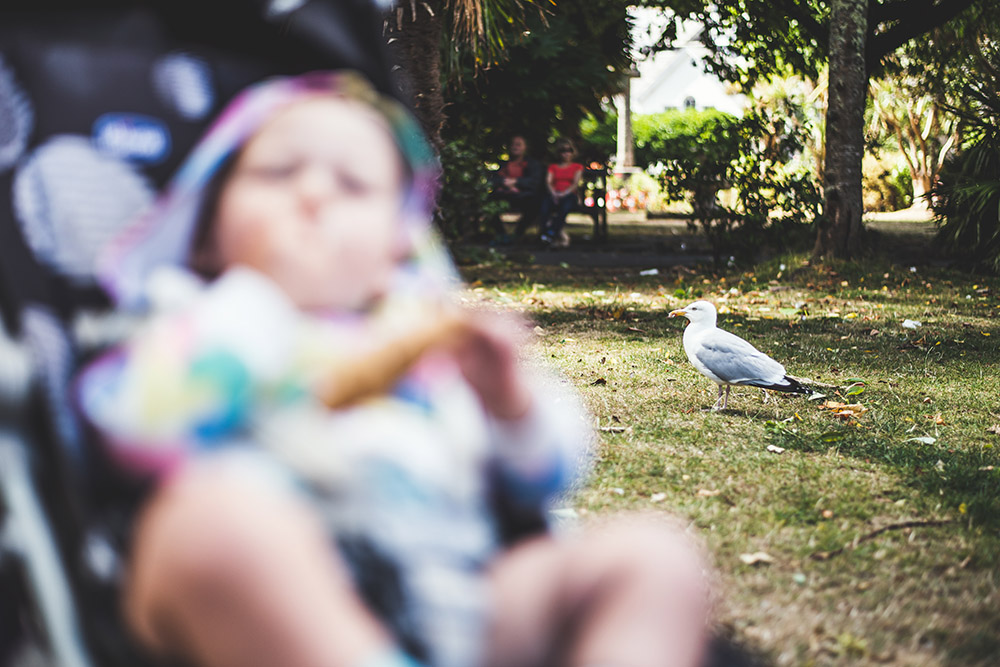
Keep wildlife photography regional.
Although it is tempting to want to rush off to the other side of the world to capture those incredibly rare types just a handful of individuals have ever seen– don’t! If you care about the environment (which lots of wildlife photographers do), it’s not very ecologically friendly to take a trip long distances. The chances of you getting a decent shot in those severe environments can be really low.
We recommend that you look to see what’s on your doorstep and keep your wildlife photography as local as possible — even in the city there are numerous wild animals around, consisting of birds, squirrels, pigeons, foxes and more. Another advantage to shooting locally is you can keep returning to the exact same spot day after day or night after night, and ultimately capture that fantastic shot you set out to accomplish.
Do not travel to the opposite of the world to discover uncommon and exotic types to photograph. Concentrate what’s on your doorstep and tell the story there. Copyright: Claire Gillo.
Stay in one area.
It may seem tempting to pursue your subject, however, you’ll most likely discover you have more success if you remain in one area with your video camera ready. This is particularly true if shooting small and fast animals. Typically when you begin tracking them they either get spooked and escape or you wind up with blurred shots of them on the relocation.
A fantastic setting for wildlife photography is in the garden ( or regional park). If you spend simply ten minutes sitting still you’ll be amazed at the amount of wildlife you have all around. Once again in some cases by observing first and looking for behavioural patterns, you will have more luck in getting the shot.